As summer approaches, we would like to share changes that will affect instructors and employees using classrooms starting Fall 2022. (Complete information about technology classrooms on campus can be found on our website.)
Technology Enhanced Classrooms (TECs)
Here is a list of TECs. The fourth column indicates if the classroom is a TEC.
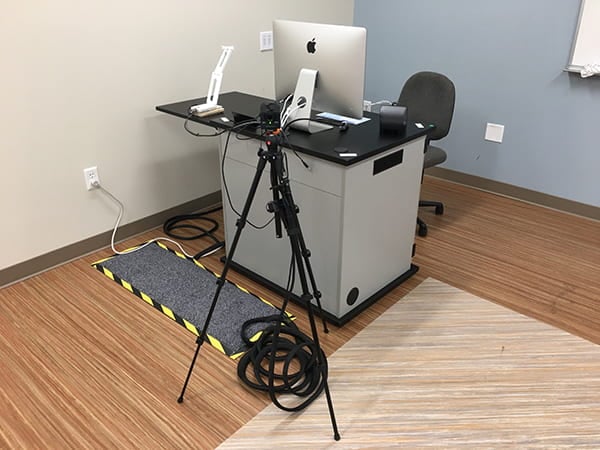
TECs have the most updated technology including a hybrid kit bundle of equipment to facilitate various modalities of teaching and learning using equipment, such as a video recorder on a tripod, Elmo document camera, Wacom graphics tablet, and video capture card to input a secondary video source into the classroom computer.
TECs (with the exception of BS 104 and BS 109 Mac computer labs) will be equipped with a new Windows all-in-one computer with a touchscreen monitor. Instructors who prefer Windows or do not have a preference should use a TEC. (Instructors can also bring their own laptop (including Mac brand) to use in the TEC by connecting to the provided HDMI cable. They must bring their own adapter, if needed.)
TECs will continue to be supported and upgraded by the campus.
Smart Classrooms
Here is a list of Smart Classrooms. The third column indicates if the classroom is a Smart Classroom.
Smart Classrooms will continue to be supported until the equipment stops working. The Smart Classrooms currently have iMac computers running both macOS and Windows OS. However, because of Apple’s recent updates to the macOS, the iMacs cannot run Windows OS. Therefore, iMacs in Smart Classrooms will be re-imaged over the summer and will only run macOS starting Fall 2022. Instructors who prefer macOS should use a Smart Classroom.
A note about Smart Classrooms – the life expectancy of the iMac computers are 1-2 years. These computers will not be replaced if they fail or if Apple puts them on the obsolete list. Smart Classrooms will eventually be phased out.
Scheduling
If you have a strong preference for Mac, please ask your Division Chair to schedule you in a Smart Classroom. If you have a preference for Windows OS, do not have a preference, or will be using your own laptop, please ask to be scheduled in a TEC (which has the most up-to-date equipment and technologies).
If you have any questions about the classroom computers you may contact the ITG Help Desk at 455-0271 or lcchelp@hawaii.edu. If you are planning to teach in any of these classrooms in the Fall, it is highly recommended that you acquaint yourselves with the equipment and technology prior to the start of the Fall semester. You may contact Brent Hirata, Educational Technologist, for an orientation or consultation on using the technologies in the classrooms for teaching.
Move over Smart Classrooms, there’s a new kid in town. As most of you already heard by now, we have a new technology classroom called the Technology Enhanced Classroom (TEC). Thanks to CARES funding, the campus was able to purchase equipment for 50 TECs (most were former Smart Classrooms and some non-Smart Classrooms) and two casual hires to assist with installation. The TECs are more powerful and flexible than the Smart Classrooms to accommodate different modalities (i.e. in-person, hybrid, and DE) for teaching and learning.
View a complete list of all technology classrooms on campus including the installation status of the TECs.
Modular Design
The new modular design for the TECs was created by our very own Electronics Technician, Garrett Chaves. It features:
laser projector providing brighter images and quieter operation
flat-field speakers
longer lifespan
centralized control
standardized user-friendly control panel
ADA lectern with more table space for instructors
the functionality of adding modules without affecting the overall operation of the room
Hybrid Kit Add-On
One such “module” added onto the TECs (funded by CARES) to support socially-distanced in-person and various hybrid and DE modalities were the “hybrid kits.” The hybrid kit contains:
Video recorder on a tripod for capturing video in the classroom for streaming, for instance, on Zoom, or creating video recordings
Elmo document camera for showing 3D objects or demonstrating
Wacom digital tablet for annotating or drawing on the computer, for instance on Zoom or slides
Elgato video capture card to allow multiple video inputs for streaming, for instance, on Zoom, or creating video recordings
Lanyard mic to allow the instructor to be heard, for instance, in Zoom, as they walk about in the classroom
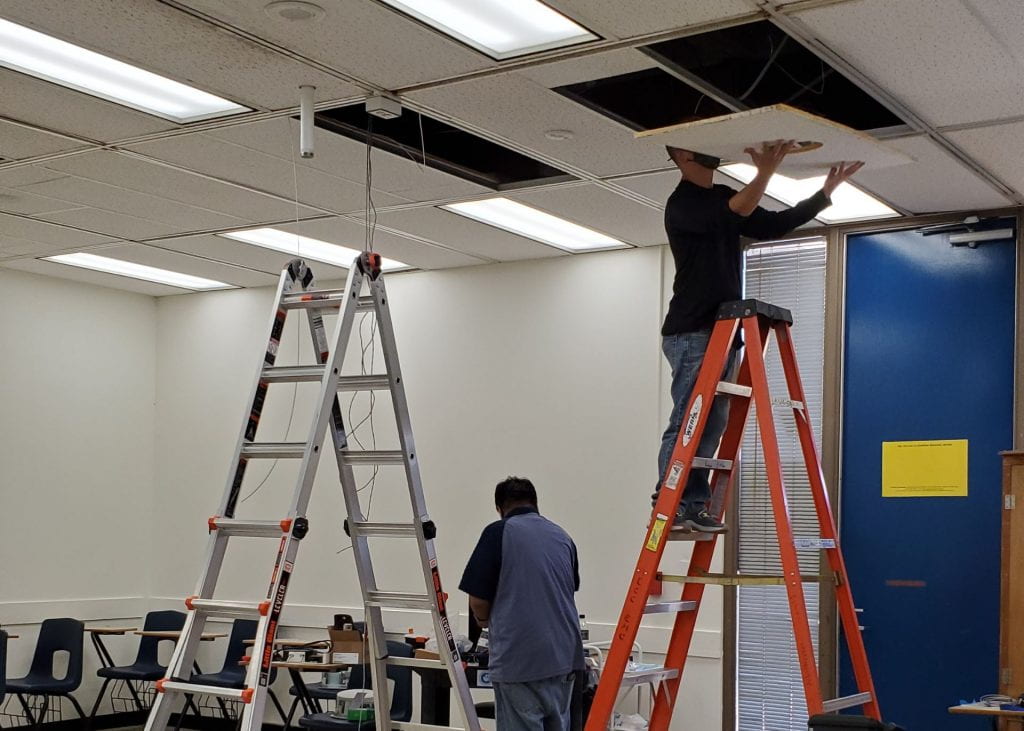
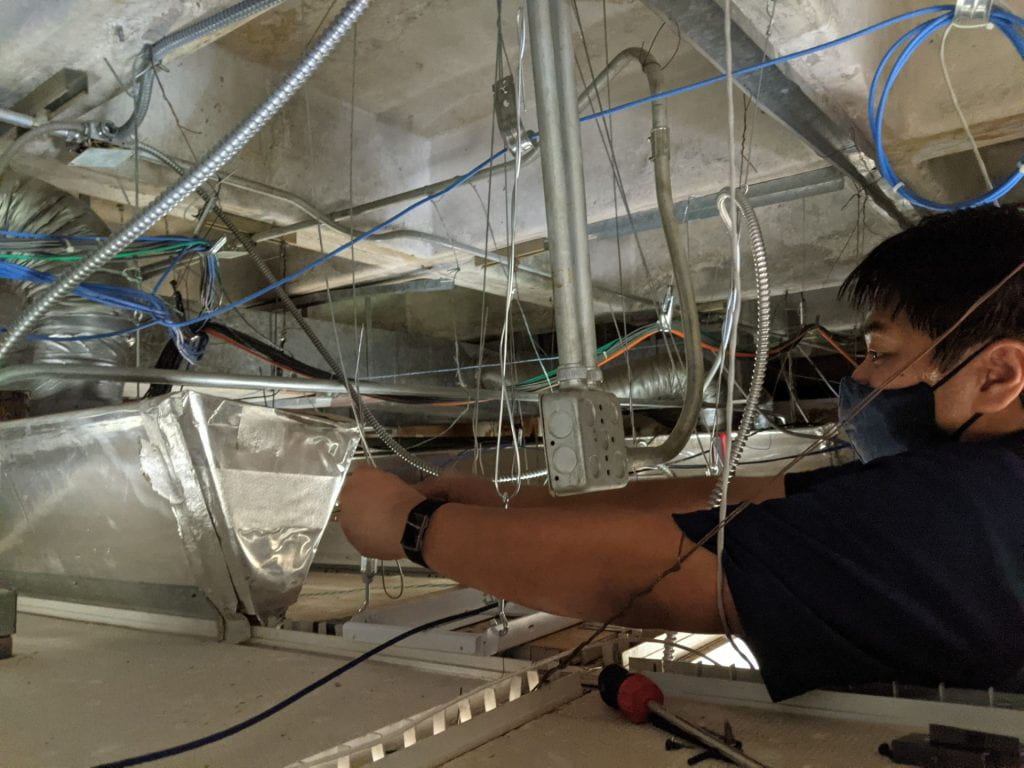
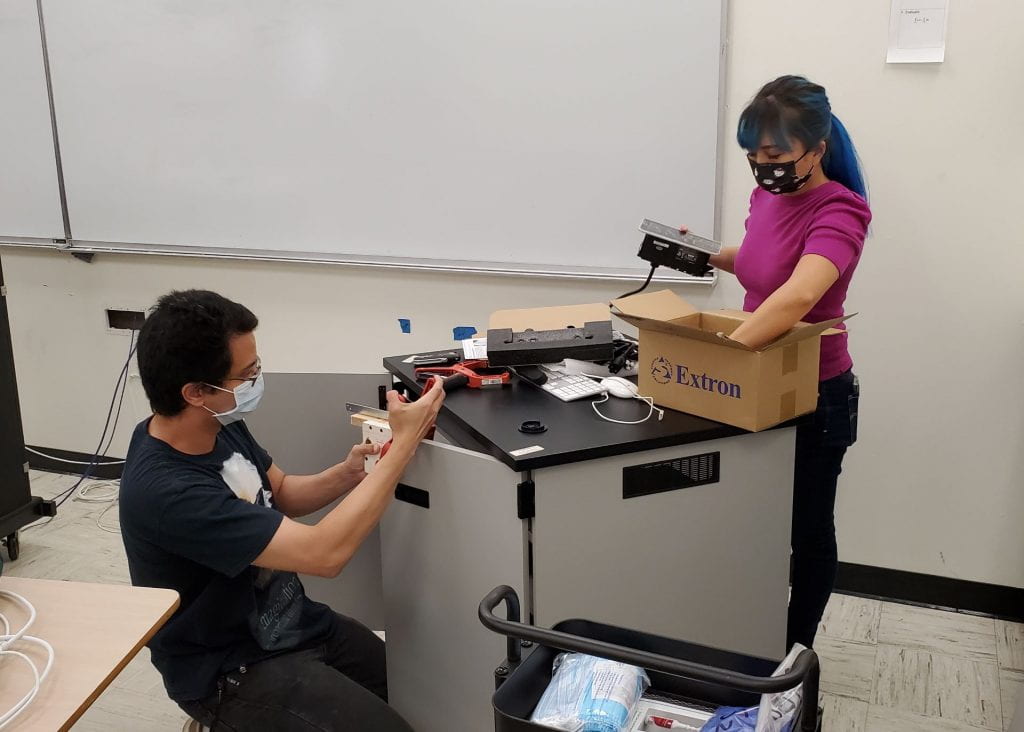
Installation
Our AV Services staff, Iban Urmeneta and Garrett Chaves (Electronics Technicians) and Ryuko Tanner and Jacob Gabriel (Classroom AV Installers) were instrumental for installing and testing equipment to get these classrooms ready for instructors to use starting in Fall 2021. TECs scheduled for Spring 2022 should be ready by the start of the semester.
EMC’s Ed Tech and AV Services units will be providing a TEC + Hybrid Kit Orientation on January 6, 2022 at 1:00 – 2:00 p.m. in LA 110. Please register to attend. Alternatively or if preferred, you can make a 1-1 appointment.
Contact
ITG Help Desk for technical problems in the classrooms. Trouble calls will be routed to the appropriate unit, ITG Help Desk or AV Services.
Educational Technologists for consultation on using the technologies in the classrooms for teaching.
My experience developing OER has changed the way I teach and interact with learning materials. I teach classes in botany and agriculture and finding materials that are relevant for Hawai‘i can be a challenge. Teaching these subjects through local examples and incorporating content relevant to Hawai‘i makes learning more relevant to my students.
I started out by just wanting one of my classes to be textbook cost zero (TXT0), which meant the library purchased an electronic copy of the book I was using that students could access for free. This was the only book available for native Hawaiian plants and ecosystems. The main issue was the language used was not very accessible and most of my students were not using the materials. After attending an OER workshop sponsored by our library I got inspired to give OER a try.
In the Spring of 2020 I was a recipient of the Leeward OER Award for a team project with Paula Mejia Velasquez, to create the OER textbook “Botany in Hawaii”. At that moment I thought I could remix some existing OER materials that were available online. Unfortunately, most of the botany materials were not specific to Hawai‘i and it quickly became clear that it would be better to write all 10 chapters from scratch. The intention of the project was to localize the botany materials and make them more relevant and enticing to students.
Daniela and Paulaʻs “Botany in Hawaii” OER textbook.
There are many things that I can talk about regarding this experience producing this OER book. For this blog post I want to focus on the part of the experience that I most enjoyed. One thing I was not expecting is that it would be hard to find illustrations and photos with an open license we could use in the project. Creating illustrations is something I was familiar with, but I I didn’t know how much work it was going to take for a project like this. Learning new software and techniques to make things look good were super challenging, but that’s something I really enjoyed and would like to continue improving on. I think that having illustrations that are locally based make a huge difference for the kind of teaching I do. I think our students can relate to the materials better and become more interested in the subject.
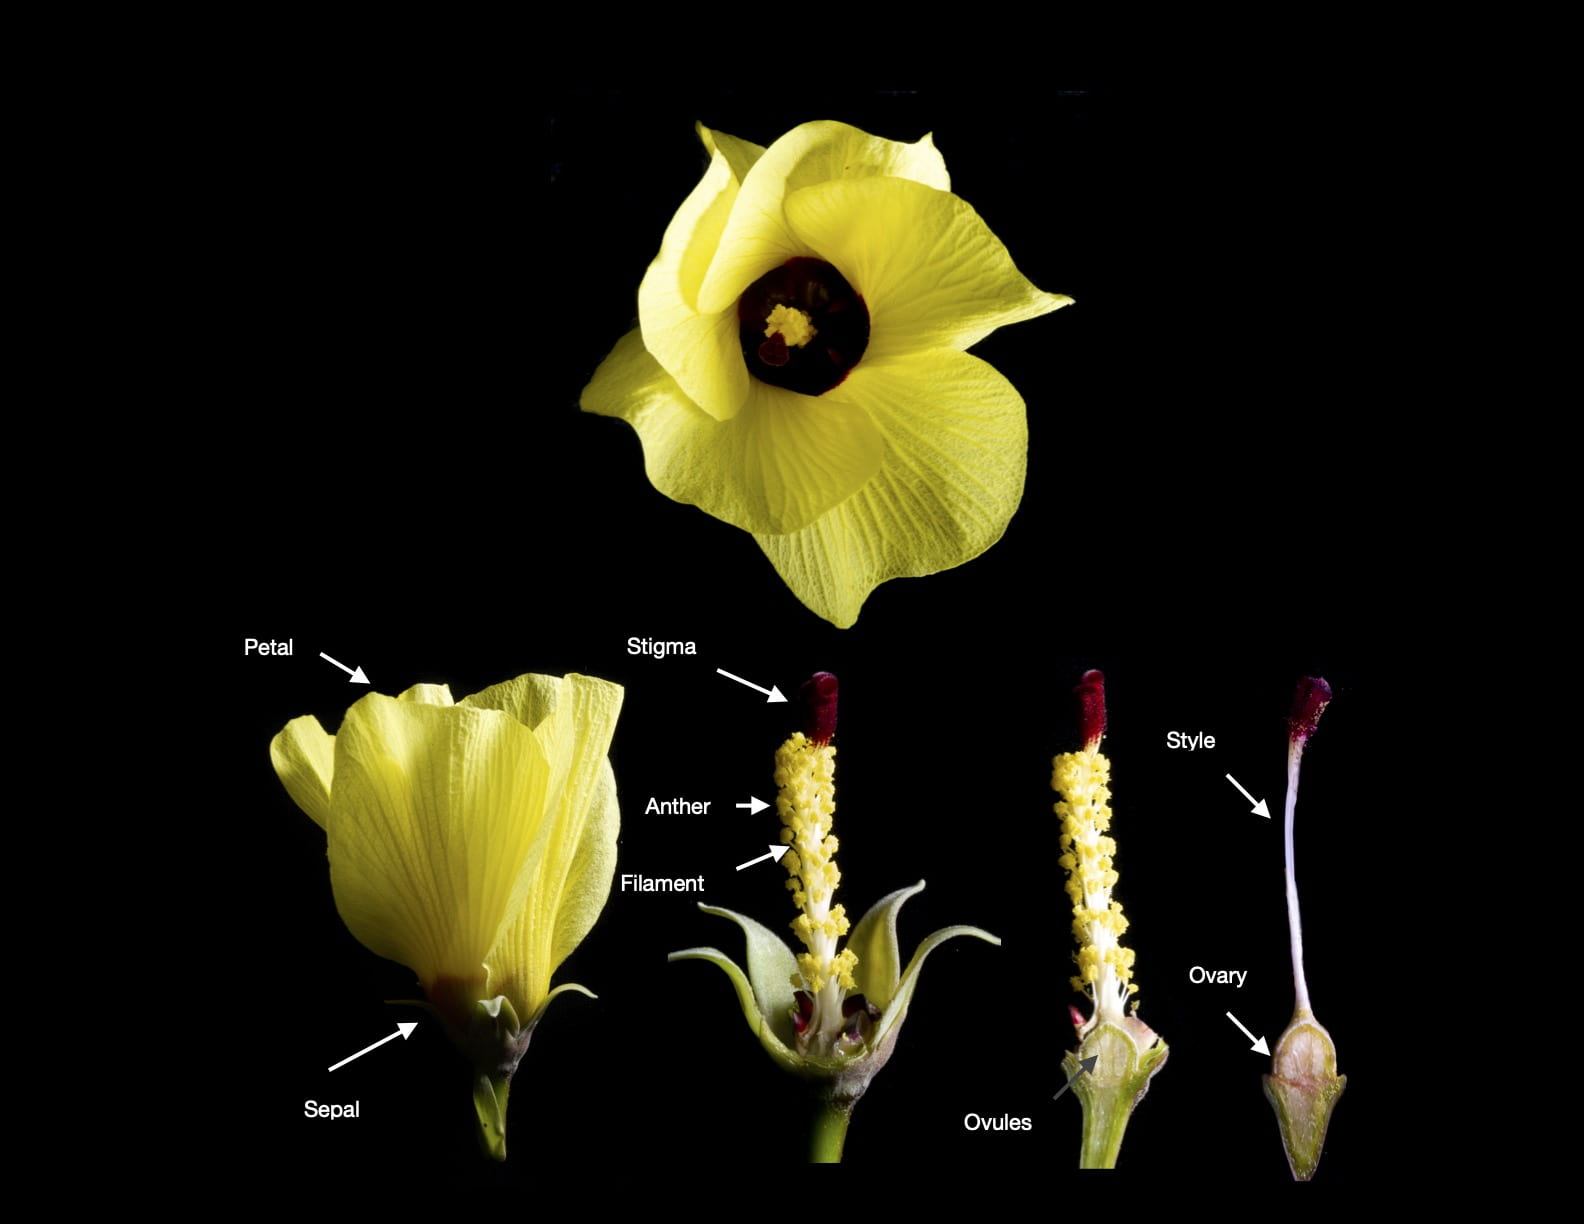
Here is an example of an illustration I put together using a plant that is found in Hawai‘i. After collecting a fresh hau flower, I took it to the lab where I photographed a step by step dissection. Then I used software to do the post editing and add labels. So now my students can learn the terminology related to flowers with a local example.
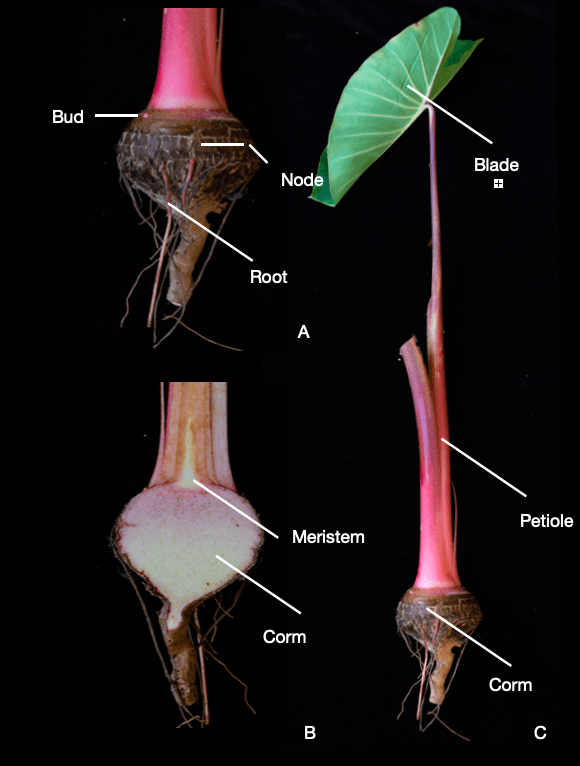
Here is another example of an illustration that I put together for the stems chapter using a variety of kalo that was grown in the gardens at Leeward. In the text, we include a linkto an illustration using Hawaiian language and knowledge.
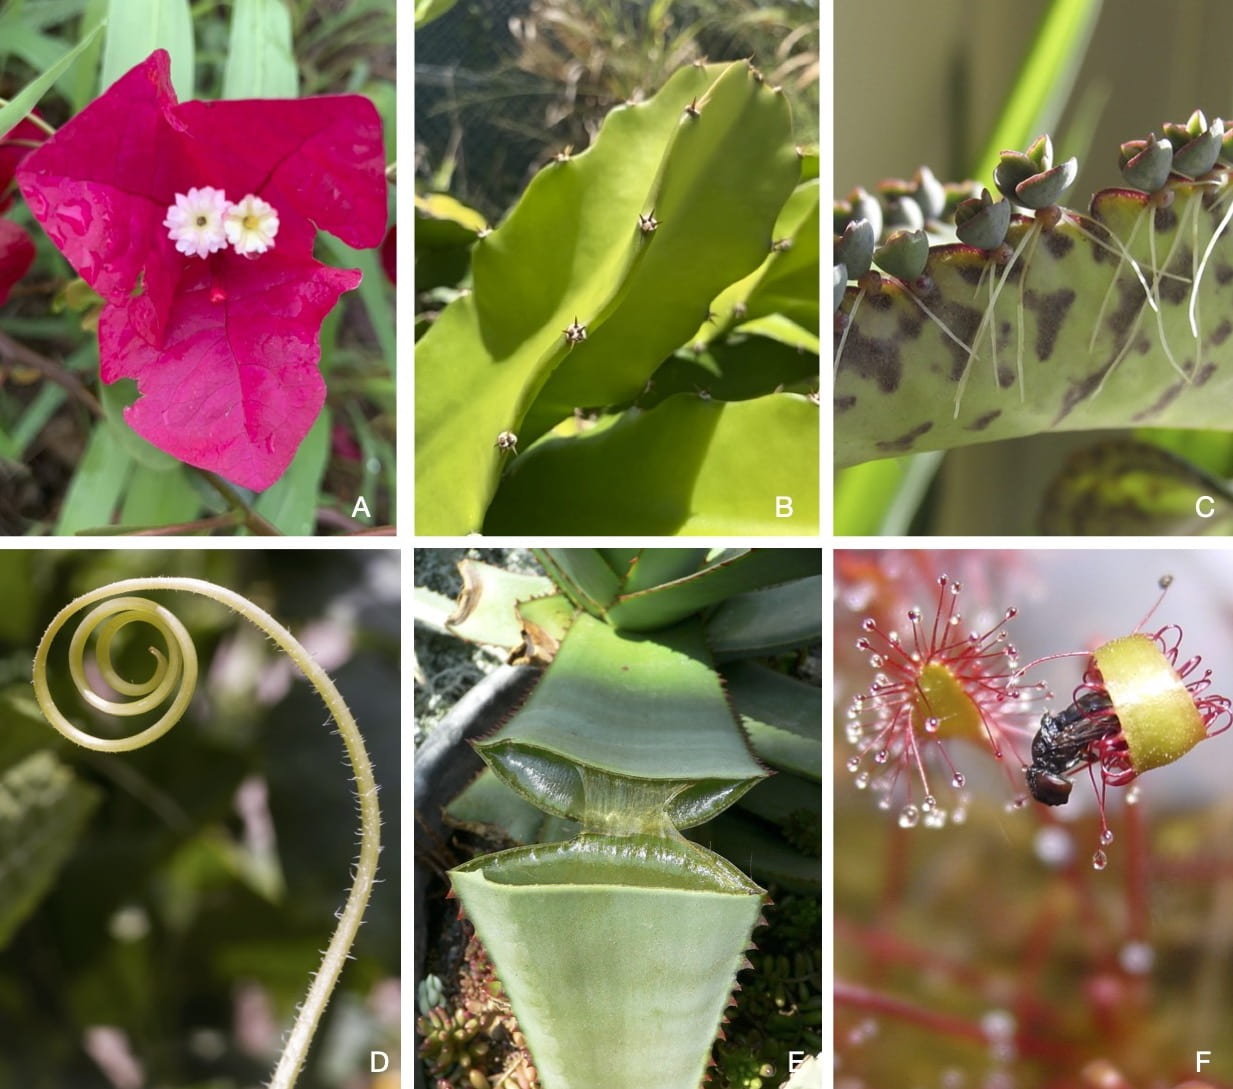
I feel really thankful to all the nature photographers that gave me permission to use their images. And to those who release their illustrations through Wikicommons which can be used and adapted by anyone. To highlight the need of sharing resources through an open license, take a look at the example below of an illustration that was put together using my photos as well as photos by other photographers. If you want to make a difference in the OER world, consider sharing your photos with an open license on sites like Flickr or Wikicommons. Photos of everything (not only plants) can be used by those working on OER projects in different disciplines.
A lot of people donated their time to peer review this book. From Leeward CC: Alyssa MacDonald, Annemarie Paikai, Kalei Laimana, Bruce Koebele and Chai Blair-Stahn reviewed the chapters and provided a lot of feedback that we used to improve things. Our library and EMC staff supported me in this long road towards having good OER materials for my classes.
Working with OER is powerful because you can create free materials that can be constantly adapted and improved. My students have also reacted positively which validates my reasons for embarking on this journey in creating local OER materials relevant to Hawai‘i that captures and shares its beauty and uniqueness through the botany lens.
Paula Mejia Velasquez
Creating our Botany OER textbook, “Botany in Hawaii,” has been quite an adventure, one that we hope will provide students with more relatable class materials and access to a more affordable education. In my case, I have converted all my classes to be textbook free for several years now by adopting OER textbooks. I got the inspiration for this from several of the OER workshops offered at Leeward CC. For several years I remixed and modified available OER materials from different sources to tailor them to the specific needs of each one of my classes. Given that there are not many OER Botany textbooks available, at one point I came to the realization that I was creating and modifying a considerable portion of the content instead of just mixing materials. In addition, most Botany textbooks (conventional and OER) often use examples from the mainland, showcasing plants that students have never seen or even heard of, which make them not very relevant to my classes, or even the islands. This is when I teamed up with Daniela to create a Botany textbook that would be focused on Hawaiian plants, presenting examples of local plants and ecosystems, and aiming to better connect our local students to Botany.
Last year, Daniela and I received the Leeward OER Creation Award, and we decided that instead of just remixing and modifying existing OER materials, we would take on the endeavor of developing an original Hawai’i-centric Botany textbook. The journey of creating an OER textbook from scratch has not only been an interesting academic exercise but also an undoubtedly time-taxing venture. As with most side projects, we ended up working crazy hours and trying to carve time from our busy schedules. We are deeply grateful to our colleagues that helped us by reviewing the book: Alyssa MacDonald, Annemarie Paikai, Bruce Koebele, Chai Blair-Stahn and Kalei Laimana, Miles Thomas, as well as to the staff at the Leeward CC library and EMC, and LibreTexts that have supported us in the process.
I really enjoyed the challenge of trying to better communicate the sometimes perceived as “dry” scientific topics in an engaging and approachable language suitable for our students and classes. I have a newly found respect for the science communicators that can make the most advanced scientific findings not only easy to understand, but also seem so cool and appreciated by the general public.
To anybody interested in OER, I would say that one of the biggest virtues of creating, mixing or using OER materials is that they are not immutable products, on the contrary, they can continuously be adapted, improved and tailored to meet the specific need in your classes. There are many possibilities, as you can adopt an OER textbook, or select only chapters or sections of interest, or mix chapters/sections from different textbooks, or even create your own OER materials. It does not matter which route you go, the main idea is to be able to offer free high quality, relevant, relatable and novel materials to our students so that they can achieve their educational goals regardless of their socioeconomic background.
Join us for a new, microlearning workshop series featuring interactive activities using: Zoom.
Our first microlearning series consists of four instructional examples using the tools in Zoom to support interaction and engage your students in your Zoom classrooms. These include:
Stamps
Polling
Breakout Rooms
Remote Control
How This Works
Simply register once for this workshop series by clicking the button below and you will receive an email on Mondays and Tuesdays (see dates below) featuring examples of using Zoom to support interaction and engage your students.
Monday 11/29: Stamps
Tuesday 11/30: Polling
Monday 12/6: Breakout Rooms
Tuesday 12/7: Remote Control
When you receive the email, take some time to review the contents. Give it a try, too, and use the resources for additional help. Reflect on how you can apply it in your classes. Jot down some ideas.
Come to our optional Virtual Open Lab (Zoom sync session) on Thursdays at 1:00-2:00 p.m. to further engage in your learning by practicing what you learned with your peers, asking questions, getting ideas for your classes, etc.
Thursday 12/2: Stamps and Polling
Thursday 12/9: Breakout Rooms and Remote Control
Furthermore, there will be an opportunity to earn a digital badge credential for this series by applying your learning. More details to come later for those who register.
Thanks for taking the time to visit our EMC Blog. If you have thoughts, questions, or feedback, please comment below. – Mahalo
We’ve got new technology equipment for use and checkout, and workshops to support your use of technology in the classroom, hybrid, and online! We hope to see you soon!
Accessibility Starter Series
Captioning Your Online Videos with YouTube on Feb. 19 at 2:30-3:30pm
Making Your Online Documents Accessible on Feb. 26 at 1:00-2:30pm
Making Your Laulima Content Accessible on Mar. 12 at 1:00-2:00pm
Tool You Can Use Series (feat. Smart (Hybrid) Classroom Technologies)
Tool You Can Use: Document Camera (ELMO) on Feb. 12 at 9:00-10:00am
Tool You Can Use: Video Recorder on Apr. 16 at 9:00-10:00am
Tool You Can Use: Elgato Video Capture Card on Apr. 23 at 9:00-10:00am
Tool You Can Use: Wacom Graphics Tablet on Apr. 30 at 9:00-10:00am
New Laulima Assessment Tools: Rubrics and Gradebook
Laulima Rubrics: Transparency, Consistency, Efficiency on Mar. 2 at 2:00-3:30pm
Laulima Gradebook: Transparency, Consistency, Efficiency on Mar. 9 at 2:00-3:30pm
From Classic to Fantastic: The New Google Sites Workshop on Mar. 23 at 1:00-2:30pm
Video Recorder Field Kit Workshop on Apr. 9 at 10:00-11:00am
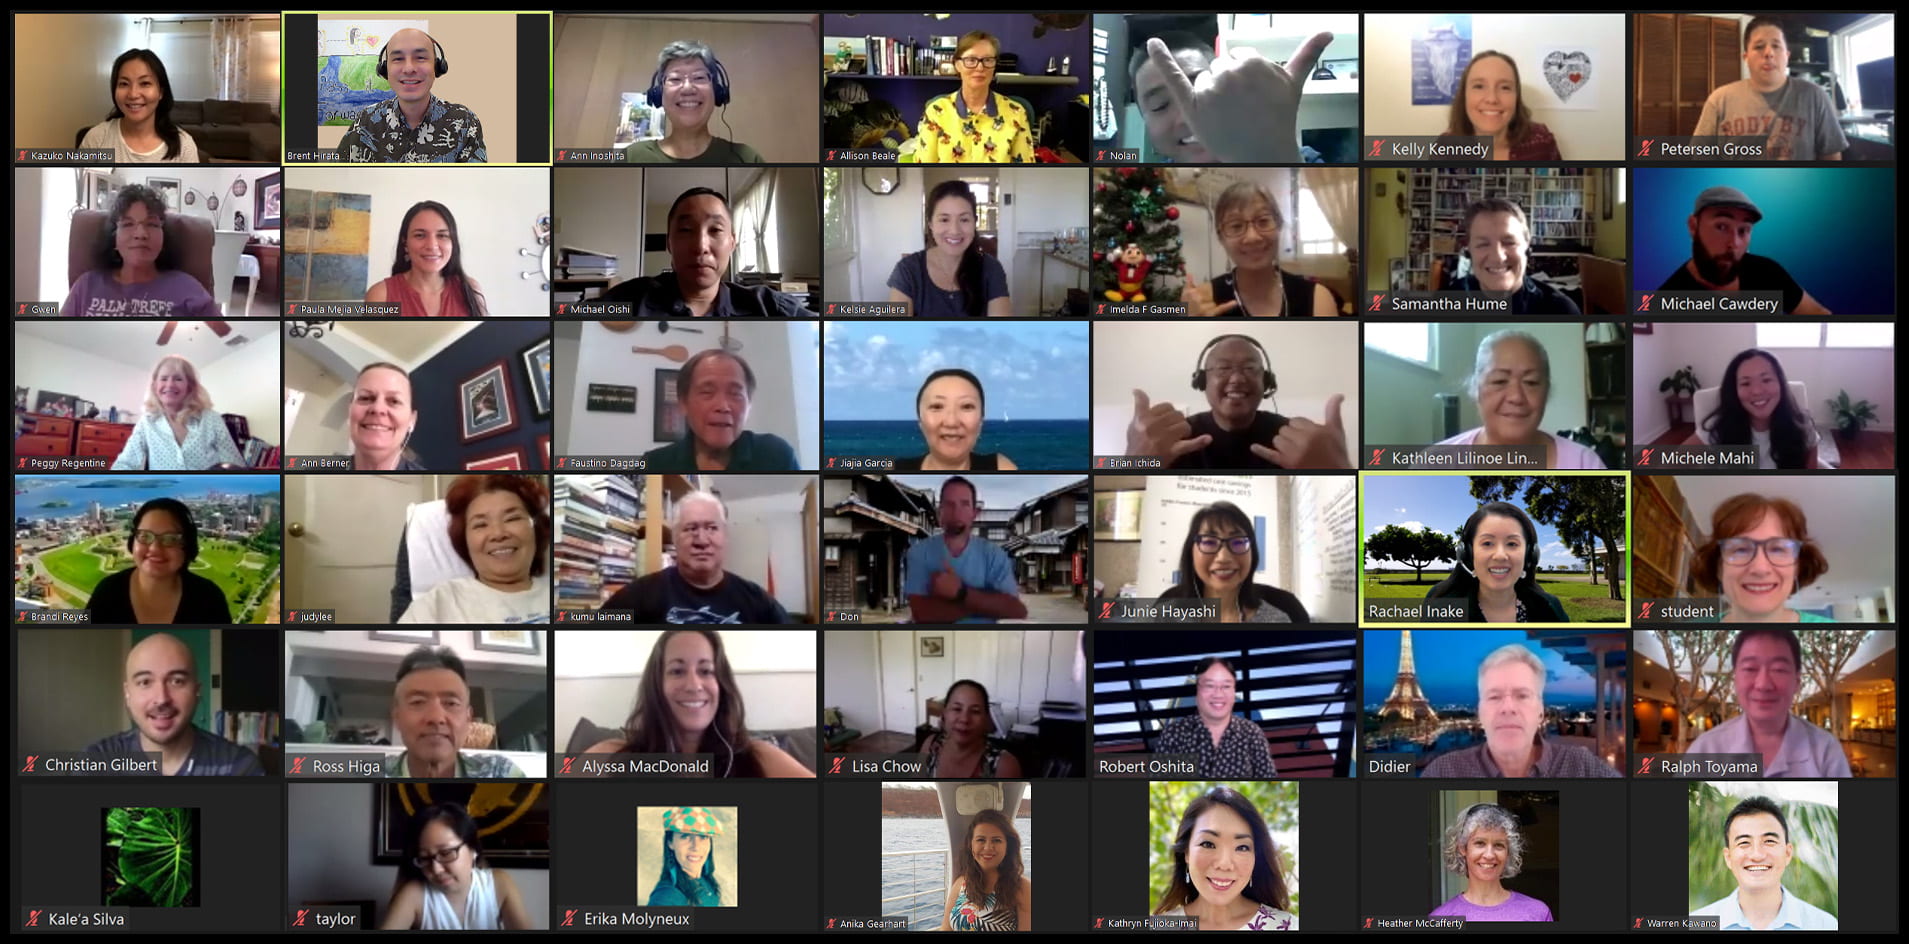
Mahalo to everyone who helped to make this year’s Tech It Out Day a success in this new format, too, synchronously online! It was so good to see everyone’s smiling faces and connect with you even at a distance. Tech It Out Day is always a fun way to kick off the new semester!
We had over 50 participants this year join us via Zoom and eight sessions of cool tools to support teaching and learning, and promoting interaction and engagement.
iSee – How to Setup Your iOS Device as an Extra Camera in Zoom
5 Finishing Touches for Laulima Lessons to Enhance the Course Experience
Create Interactive Tutorials with Iorad
Interactive Online Learning Activities with H5P
Screencasting with Loom
Communicate with Impact: Create Engaging Animated Videos with Adobe Spark
Using the New Google Sites
Jammin’ with Jamboard
Mahalo also to our faculty who presented and shared their mana’o with us this year: Anika Gearheart, Junie Hayashi, Kelly Kennedy, Michael Cawdery, and Erin Thompson.
Participants Said…
“All of the sessions were incredibly helpful for my new online classes! I particularly liked Iorad to help “technology challenged” students access all of the tools in the course.”
“I will be using Loom to record my course and syllabus intro and hope to use it for more difficult assignments. Love Jamboard and will use it in my synchronous meetings with students.”
“I’m excited to use H5P in my Laulima Lessons.”
“Tech-it-out days are always engaging and useful to hear about new technologies and platforms. Great job on the first Zoom version of the workshops! It was well organized and easy to follow!”
Recordings
Did you miss Tech It Out Day or want to re-visit a session? You can access the session info, presenter info, resources, and recordings on our website. Also, don’t forget to request your Participant Badge and claim it by the end of this month if you haven’t already done so.
See you at next year’s Tech It Out Day! You might even have something awesome to share as a presenter!
Looking for More?
Loom
By popular demand, we’ll be doing a full workshop on Loom, a free video screencasting tool. So many uses for teaching, learning, or work tasks, for screencasting how-to video tutorials, video presentations, mini lecture presentations, video feedback on students’ work, and more! Save the date: Friday, September 18, 2020 at 1:00-2:30pm. Watch for email from the Educational Media Center to register and for more workshops coming this semester.
CanDO PD
Our CanDO PD (Classroom and Distance Online Professional Development) series is starting next week! Don’t miss out on this valuable opportunity to help you examine your course and explore approaches for online delivery. These will also help you in meeting the Baseline Recommended Actions for Distance-Delivered Instruction and even some of the Distance Education Guidelines. There are five, two-week online “mini courses” to choose from or sign up for all five!
One last push as we head into finals weeks and grading. We are almost through the semester! In case you missed our workshops last week, we’ve got you covered. Also, we are working hard to provide a professional development series this summer to help you prepare for Fall semester. Don’t miss out on this opportunity; you CanDO it!
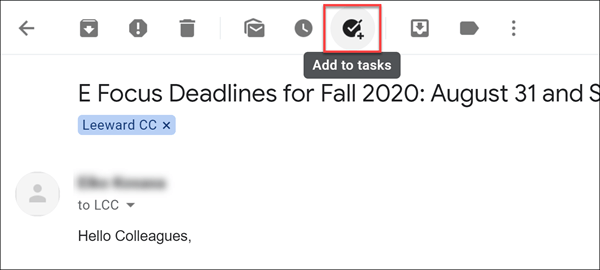
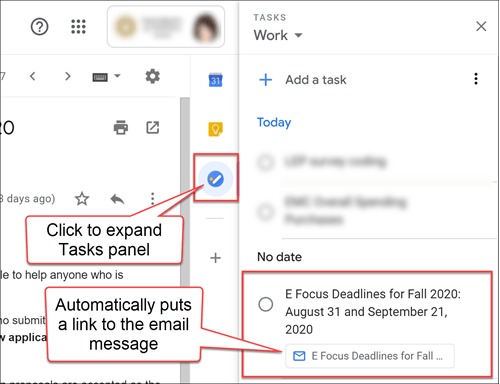
Gmail now has a button in the toolbar to add an email message to Tasks. Not only will it add to your Tasks list (conveniently in the right side panel of your Gmail) but it automatically puts a link to your email message so you can pull it up quickly from Tasks instead of rummaging through your emails.
Once you have the item in your Tasks, you can edit its title and put a due date (which puts an entry in your Google Calendar, too). When you’ve completed the task, click the radio button next to it to cross it off your list! ✔️
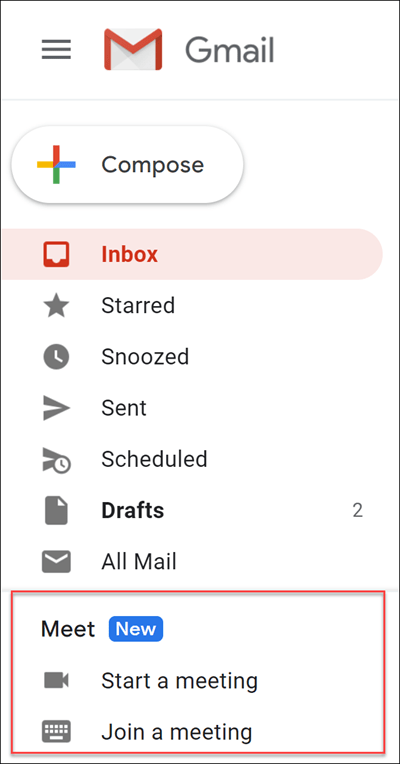
Google Meet
Google Meet, a video conferencing platform, is now conveniently in your Gmail making it quick to create or join a Meet. [How-to use Google Meet in Gmail]
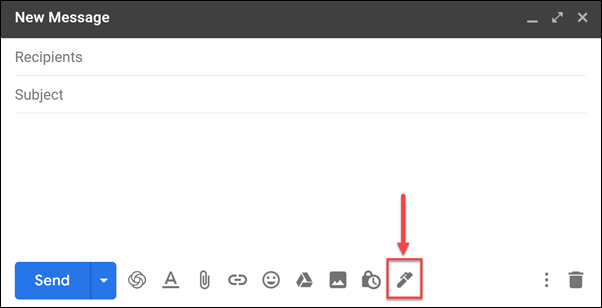
Multiple Signatures
Create signatures for different situations or audiences such as: personal, professional, condensed, etc. The “Insert signatures” button is in the Gmail message window when you compose a new message, reply, or forward a message. [How-to create a Gmail signature]
Google Meet
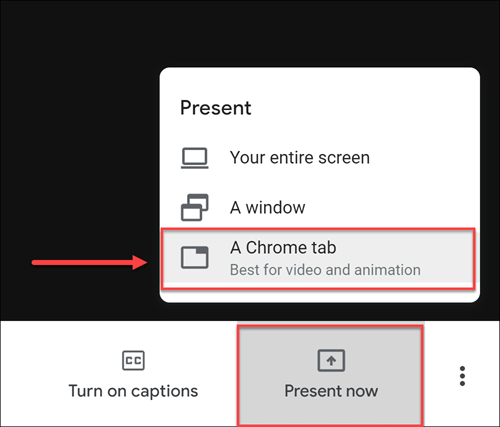
Present high-quality video and audio
Google Meet is a video conferencing platform that many of us are using for remote meetings, office hours, and class sessions. Before you wouldn’t be able to share a streaming video in your session to your audience, but now you can! You can now share audio and video (with audio) by selecting the option to present an individual Chrome browser tab.
See up to 16 webcams in tiled view
Google Meet can now show up to 16 webcams on the screen in tiled view. By default, Meet automatically displays the most active content and participants. Usually if you have three or more participants with webcams in a session and are not presenting (i.e. screen sharing), you will have the tiled layout shown.
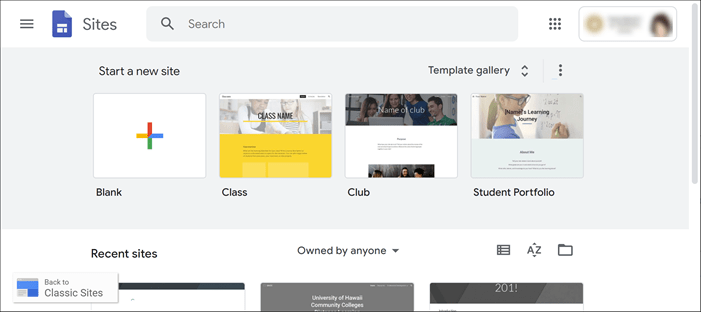
The new Google Sites is here! Classic Google Sites will be phasing out in 2021 so if you have any Google Sites you want to continue using, convert them to the new Google Sites before next year. The new Google Sites is modern and simplified with an adaptive interface allowing you to easily create professional-looking websites without having to code. [How to use the new Google Sites]
For those of you who have been using Google Sites as weekly or topic modules for your courses to present content, but use Laulima for assignments, quizzes, forums, etc., you may want to consider using Laulima Lessons, a tool to create/present content modules. Not only is Lessons easy to use and allows you to present your content in an organized and visual way (like being able to embed content), but the advantage over Google Sites is that it can integrate items you have in other Laulima tools. This allows you to pull everything together in Lessons. You can link-in specific assignments from Laulima Assignments, specific discussion topics from Laulima Forums, and more. Contact the Educational Technology unit for assistance.
 My experience developing OER has changed the way I teach and interact with learning materials. I teach classes in botany and agriculture and finding materials that are relevant for Hawai‘i can be a challenge. Teaching these subjects through local examples and incorporating content relevant to Hawai‘i makes learning more relevant to my students.
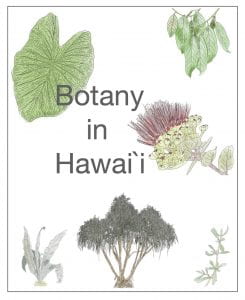
 Creating our Botany OER textbook, “