While email is a traditional way to send formal correspondence with each other there is a more engaging, on the go, way for educators and students to communicate with each other called Remind.com.
What is Remind.com?
Remind is a free service for educators to broadcast short timely announcements and updates to subscribed students via free Remind smartphone app (recommended) or traditional text message (without exchanging phone numbers). Alternatively Remind can also broadcast to subscribed email accounts and post broadcasted messages to a webpage archive. Remind was developed for educators, previously known as Remind101, their audience is K12 and their user policy seems respectful to users privacy, in addition Remind is an approved UH ITS Third Party Online tool. Lastly Remind works with your existing UH Google account by simple selecting to sign in with Google.
How does Remind.com work?
It starts with the course instructor creating a Remind Classroom and join link. The instructor then shares the join link with their students who would join the Remind class to receive messages.
Examples of using Remind.com for instruction would be for messaging course announcements or assignments reminders (Remind messages can be schedule to be delivered ahead of time). Another example is to use Remind as a student friendly way to receive questions from your students. Lastly, remind could support student communication within small group projects (eliminating the exchange of personal phone numbers or social media accounts) because Remind could allow for messaging between students in a small group directly within the Remind app.
Real World: Using Remind within instruction:
“I have used Remind for course announcements. Student are encouraged to sign up to receive messages, if they don’t I also embed the Remind message archive page within my Laulima course site.” Brent, ED 279
“I have also used Remind as an alternative way for students to ask me questions or seek clarification about course assignments. I also find students are able to snap pictures of their computer screen with their phones and easily include the images in their Remind message to support their questions” -Brent, ED 279
How will the Educational Media Center use Remind.com?
We’ll be using Remind.com to engage with participants as well as to delivery announcements and resources related to EMC Workshops on the Go professional development series.
Frequently Asked Questions:
General:
Q: Can students message each other through Remind App?
A: Instructors can enable or disable the ability for students to message each other (such as for small group work) in the Remind App. Students using the Remind App will always be able to message their instructor/ facilitator.
Text Messaging:
Q: Will phone numbers be shared with the instructor or other participants in Remind?
A: No, phone numbers will remain private and are held by Remind.com, they are not shared within your Remind community (including with your instructor/ facilitator)
Q: If I sign up to receive messages via text will I be charged?
A: If you phone plan does not include unlimited text messaging you should be aware that standard text messaging rates do apply (consider using the Remind App)
Q: Can I unsubscribe from receiving Remind text messages?
A: You can unsubscribe at any time by texting STOP or let us know and we can remove you.
Q: Can a student reply to a Remind text message from their instructor?
A: No, this is a one-way broadcast. You will not be able to text us. (consider using the Remind App, which does allow for 2 way messaging)
Thanks for taking the time to visit our EMC Blog. If you have thoughts, questions, or feedback, please comment below. – Mahalo
Move over Smart Classrooms, there’s a new kid in town. As most of you already heard by now, we have a new technology classroom called the Technology Enhanced Classroom (TEC). Thanks to CARES funding, the campus was able to purchase equipment for 50 TECs (most were former Smart Classrooms and some non-Smart Classrooms) and two casual hires to assist with installation. The TECs are more powerful and flexible than the Smart Classrooms to accommodate different modalities (i.e. in-person, hybrid, and DE) for teaching and learning.
View a complete list of all technology classrooms on campus including the installation status of the TECs.
Modular Design
The new modular design for the TECs was created by our very own Electronics Technician, Garrett Chaves. It features:
laser projector providing brighter images and quieter operation
flat-field speakers
longer lifespan
centralized control
standardized user-friendly control panel
ADA lectern with more table space for instructors
the functionality of adding modules without affecting the overall operation of the room
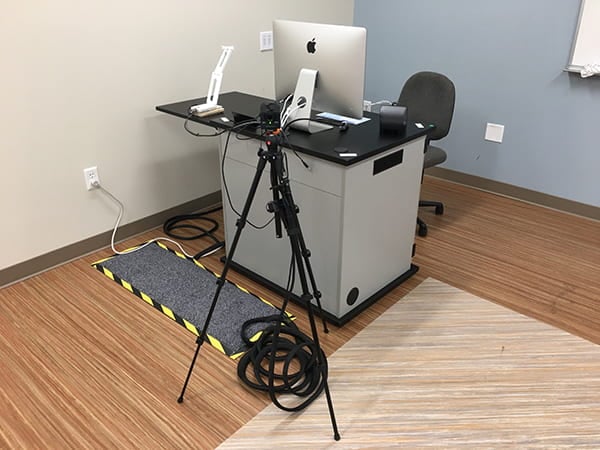
Hybrid Kit Add-On
One such “module” added onto the TECs (funded by CARES) to support socially-distanced in-person and various hybrid and DE modalities were the “hybrid kits.” The hybrid kit contains:
Video recorder on a tripod for capturing video in the classroom for streaming, for instance, on Zoom, or creating video recordings
Elmo document camera for showing 3D objects or demonstrating
Wacom digital tablet for annotating or drawing on the computer, for instance on Zoom or slides
Elgato video capture card to allow multiple video inputs for streaming, for instance, on Zoom, or creating video recordings
Lanyard mic to allow the instructor to be heard, for instance, in Zoom, as they walk about in the classroom
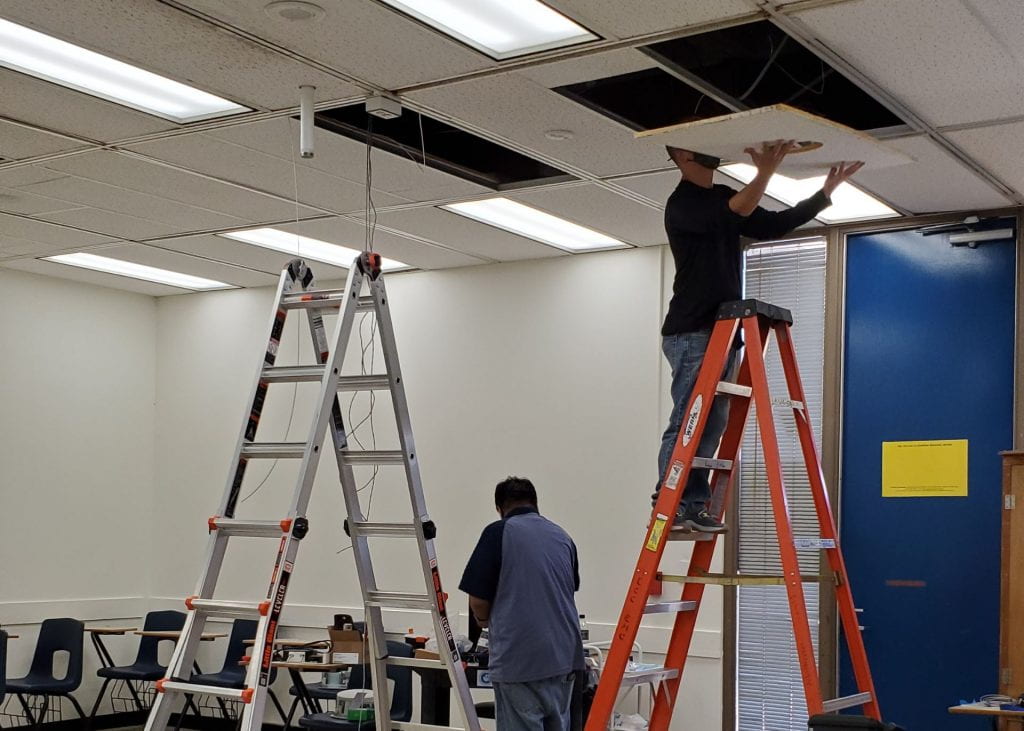
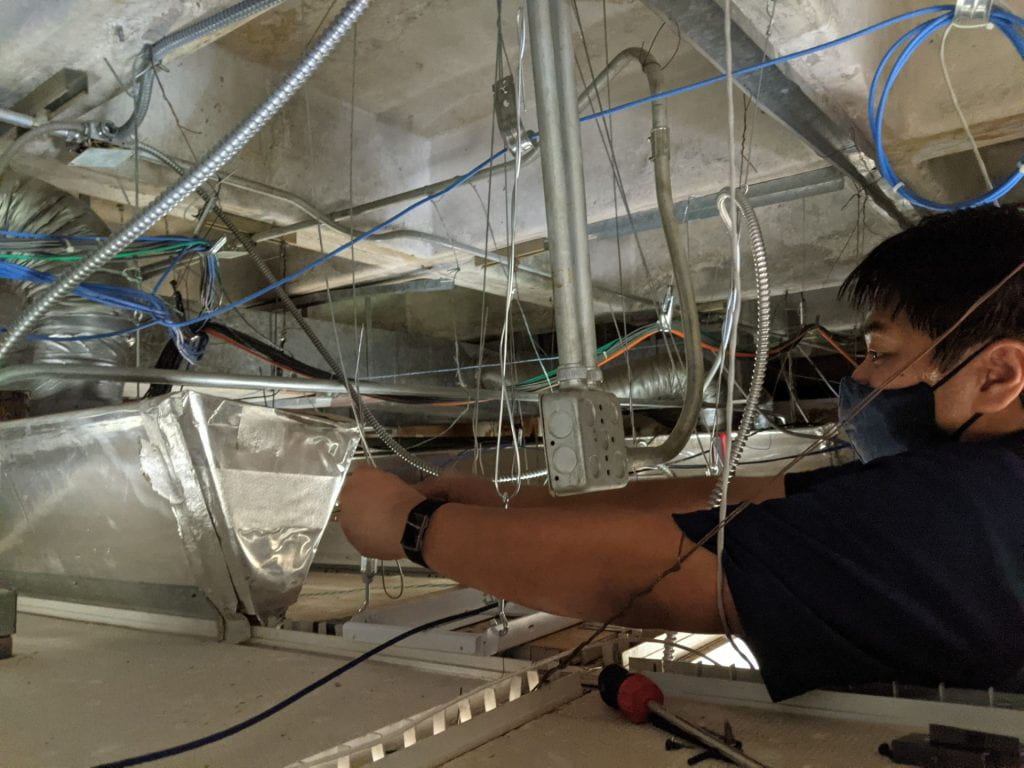
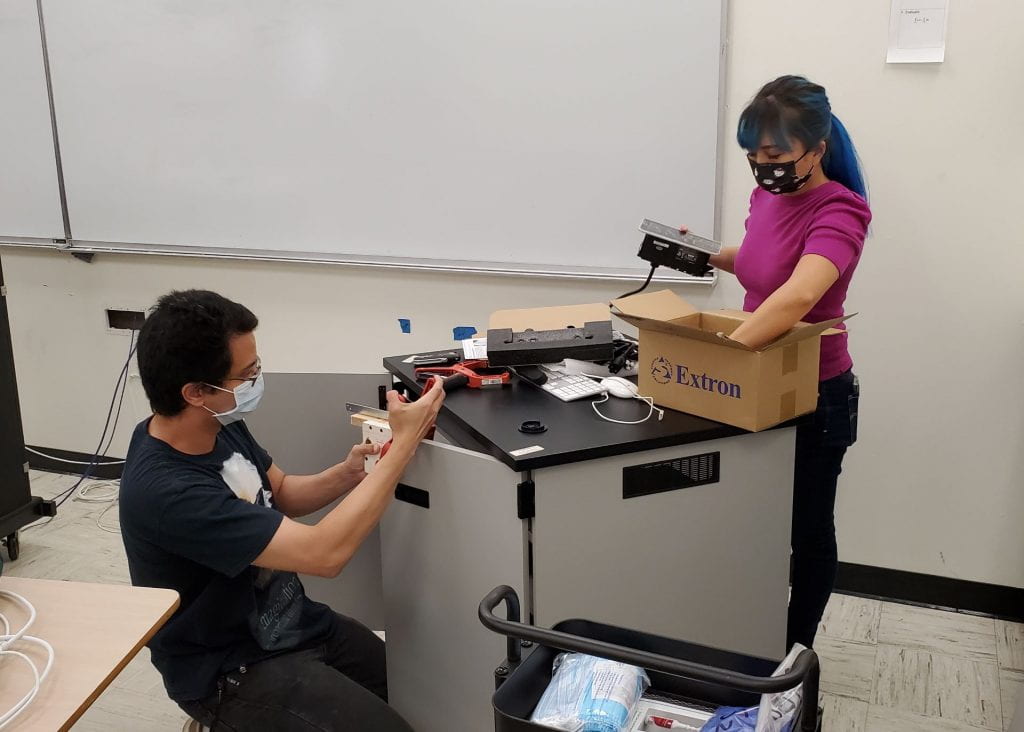
Installation
Our AV Services staff, Iban Urmeneta and Garrett Chaves (Electronics Technicians) and Ryuko Tanner and Jacob Gabriel (Classroom AV Installers) were instrumental for installing and testing equipment to get these classrooms ready for instructors to use starting in Fall 2021. TECs scheduled for Spring 2022 should be ready by the start of the semester.
EMC’s Ed Tech and AV Services units will be providing a TEC + Hybrid Kit Orientation on January 6, 2022 at 1:00 – 2:00 p.m. in LA 110. Please register to attend. Alternatively or if preferred, you can make a 1-1 appointment.
Contact
ITG Help Desk for technical problems in the classrooms. Trouble calls will be routed to the appropriate unit, ITG Help Desk or AV Services.
Educational Technologists for consultation on using the technologies in the classrooms for teaching.
My experience developing OER has changed the way I teach and interact with learning materials. I teach classes in botany and agriculture and finding materials that are relevant for Hawai‘i can be a challenge. Teaching these subjects through local examples and incorporating content relevant to Hawai‘i makes learning more relevant to my students.
I started out by just wanting one of my classes to be textbook cost zero (TXT0), which meant the library purchased an electronic copy of the book I was using that students could access for free. This was the only book available for native Hawaiian plants and ecosystems. The main issue was the language used was not very accessible and most of my students were not using the materials. After attending an OER workshop sponsored by our library I got inspired to give OER a try.
In the Spring of 2020 I was a recipient of the Leeward OER Award for a team project with Paula Mejia Velasquez, to create the OER textbook “Botany in Hawaii”. At that moment I thought I could remix some existing OER materials that were available online. Unfortunately, most of the botany materials were not specific to Hawai‘i and it quickly became clear that it would be better to write all 10 chapters from scratch. The intention of the project was to localize the botany materials and make them more relevant and enticing to students.
Daniela and Paulaʻs “Botany in Hawaii” OER textbook.
There are many things that I can talk about regarding this experience producing this OER book. For this blog post I want to focus on the part of the experience that I most enjoyed. One thing I was not expecting is that it would be hard to find illustrations and photos with an open license we could use in the project. Creating illustrations is something I was familiar with, but I I didn’t know how much work it was going to take for a project like this. Learning new software and techniques to make things look good were super challenging, but that’s something I really enjoyed and would like to continue improving on. I think that having illustrations that are locally based make a huge difference for the kind of teaching I do. I think our students can relate to the materials better and become more interested in the subject.
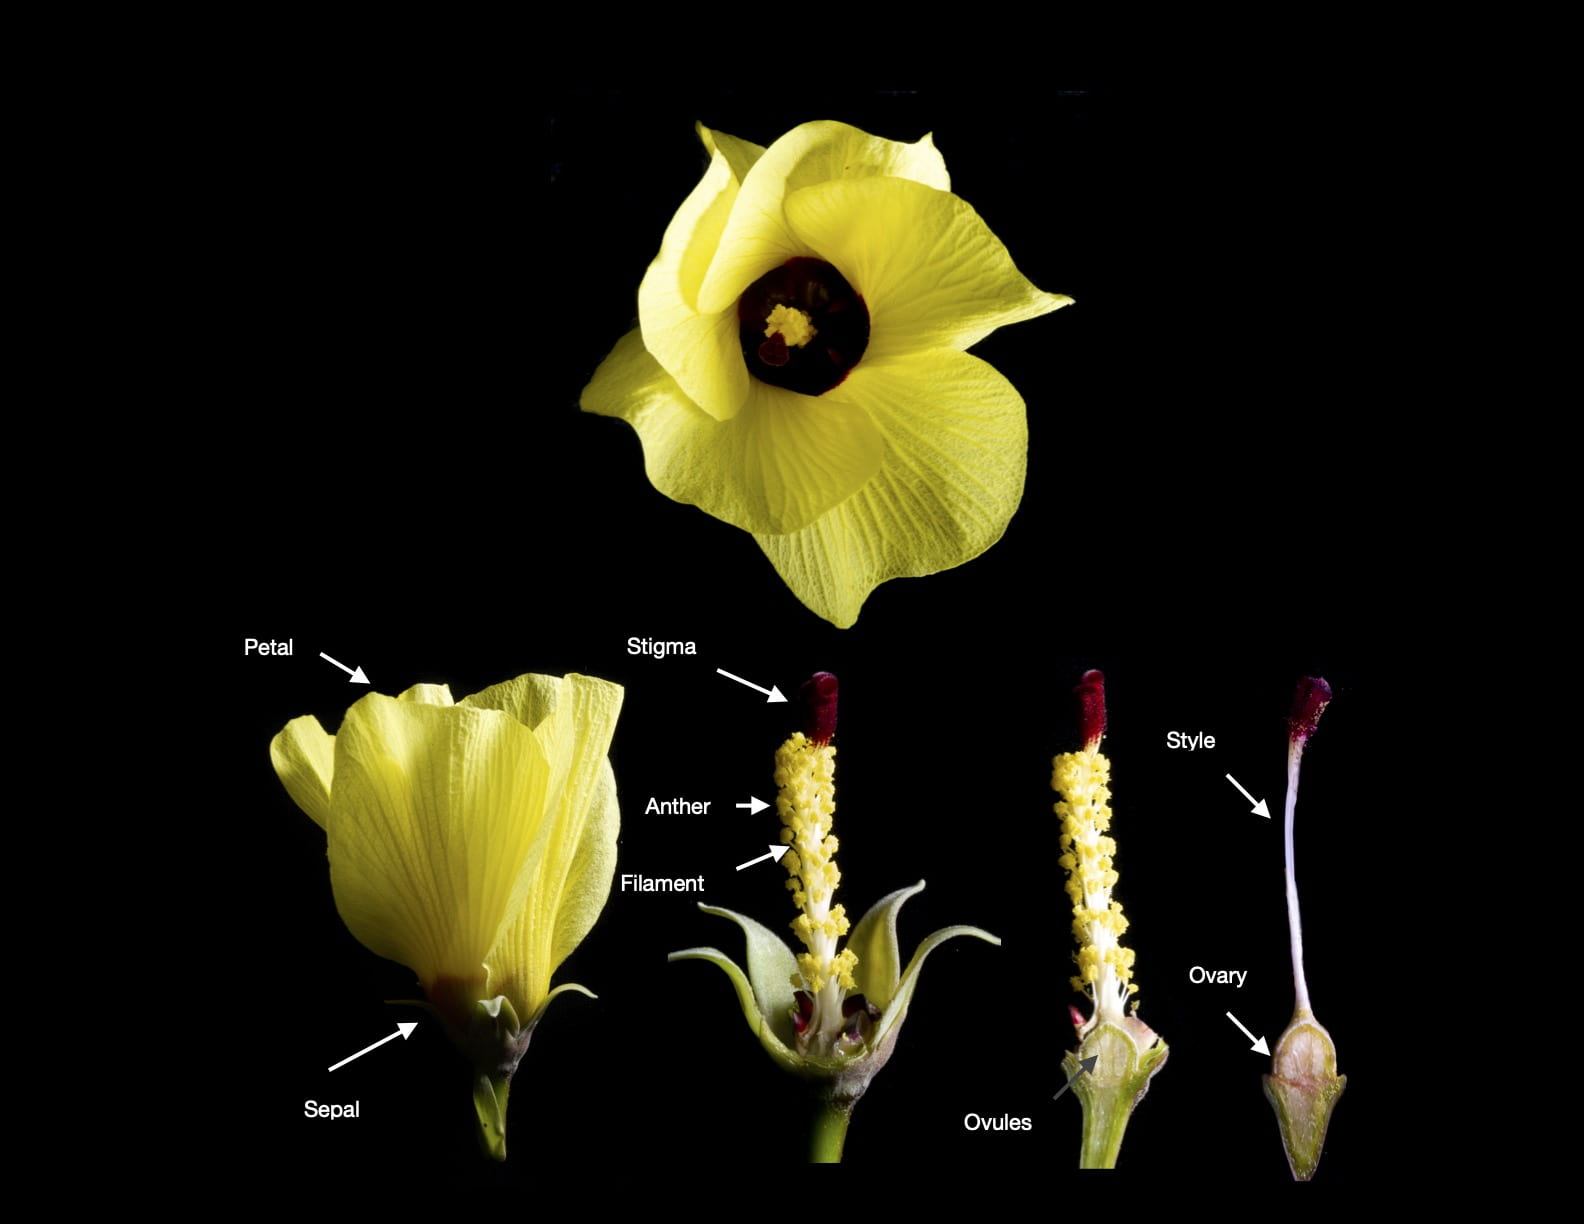
Here is an example of an illustration I put together using a plant that is found in Hawai‘i. After collecting a fresh hau flower, I took it to the lab where I photographed a step by step dissection. Then I used software to do the post editing and add labels. So now my students can learn the terminology related to flowers with a local example.
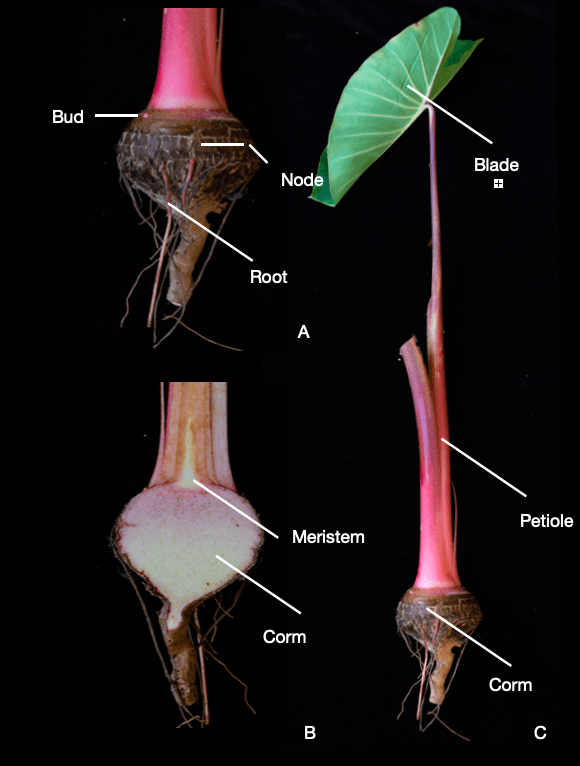
Here is another example of an illustration that I put together for the stems chapter using a variety of kalo that was grown in the gardens at Leeward. In the text, we include a linkto an illustration using Hawaiian language and knowledge.
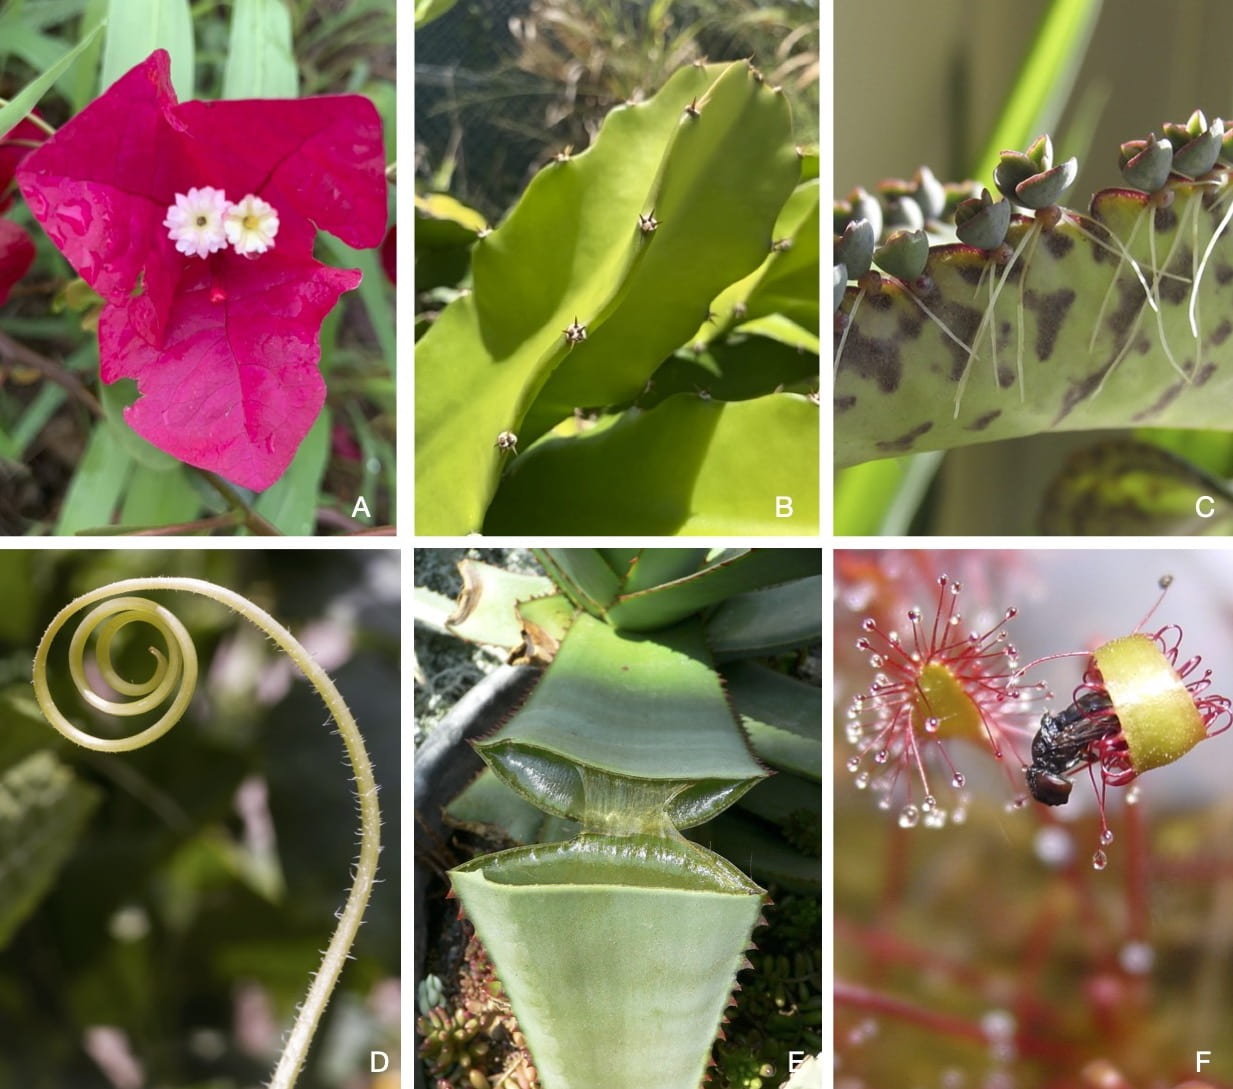
I feel really thankful to all the nature photographers that gave me permission to use their images. And to those who release their illustrations through Wikicommons which can be used and adapted by anyone. To highlight the need of sharing resources through an open license, take a look at the example below of an illustration that was put together using my photos as well as photos by other photographers. If you want to make a difference in the OER world, consider sharing your photos with an open license on sites like Flickr or Wikicommons. Photos of everything (not only plants) can be used by those working on OER projects in different disciplines.
A lot of people donated their time to peer review this book. From Leeward CC: Alyssa MacDonald, Annemarie Paikai, Kalei Laimana, Bruce Koebele and Chai Blair-Stahn reviewed the chapters and provided a lot of feedback that we used to improve things. Our library and EMC staff supported me in this long road towards having good OER materials for my classes.
Working with OER is powerful because you can create free materials that can be constantly adapted and improved. My students have also reacted positively which validates my reasons for embarking on this journey in creating local OER materials relevant to Hawai‘i that captures and shares its beauty and uniqueness through the botany lens.
Paula Mejia Velasquez
Creating our Botany OER textbook, “Botany in Hawaii,” has been quite an adventure, one that we hope will provide students with more relatable class materials and access to a more affordable education. In my case, I have converted all my classes to be textbook free for several years now by adopting OER textbooks. I got the inspiration for this from several of the OER workshops offered at Leeward CC. For several years I remixed and modified available OER materials from different sources to tailor them to the specific needs of each one of my classes. Given that there are not many OER Botany textbooks available, at one point I came to the realization that I was creating and modifying a considerable portion of the content instead of just mixing materials. In addition, most Botany textbooks (conventional and OER) often use examples from the mainland, showcasing plants that students have never seen or even heard of, which make them not very relevant to my classes, or even the islands. This is when I teamed up with Daniela to create a Botany textbook that would be focused on Hawaiian plants, presenting examples of local plants and ecosystems, and aiming to better connect our local students to Botany.
Last year, Daniela and I received the Leeward OER Creation Award, and we decided that instead of just remixing and modifying existing OER materials, we would take on the endeavor of developing an original Hawai’i-centric Botany textbook. The journey of creating an OER textbook from scratch has not only been an interesting academic exercise but also an undoubtedly time-taxing venture. As with most side projects, we ended up working crazy hours and trying to carve time from our busy schedules. We are deeply grateful to our colleagues that helped us by reviewing the book: Alyssa MacDonald, Annemarie Paikai, Bruce Koebele, Chai Blair-Stahn and Kalei Laimana, Miles Thomas, as well as to the staff at the Leeward CC library and EMC, and LibreTexts that have supported us in the process.
I really enjoyed the challenge of trying to better communicate the sometimes perceived as “dry” scientific topics in an engaging and approachable language suitable for our students and classes. I have a newly found respect for the science communicators that can make the most advanced scientific findings not only easy to understand, but also seem so cool and appreciated by the general public.
To anybody interested in OER, I would say that one of the biggest virtues of creating, mixing or using OER materials is that they are not immutable products, on the contrary, they can continuously be adapted, improved and tailored to meet the specific need in your classes. There are many possibilities, as you can adopt an OER textbook, or select only chapters or sections of interest, or mix chapters/sections from different textbooks, or even create your own OER materials. It does not matter which route you go, the main idea is to be able to offer free high quality, relevant, relatable and novel materials to our students so that they can achieve their educational goals regardless of their socioeconomic background.
EMC Workshops on the Go is a professional development series designed around a micro learning framework. The series provides focused learning of chunked content with reflection, hands-on exploration with a live learner support event. Instructional examples and resources were provided to introduce the tools and kick-start the ideation process to engage and promote active learning within your teaching. Workshop activities consisted of online readings and video content, independent work time and optional synchronous question and answer session. Specifically for the past two weeks we were focused on the Zoom features of: Stamps, Polling, Breakout Rooms and Remote Control. Participants are encouraged to take the additional step to create and share an artifact that they’ve made to exemplify their proficiency in at least two of micro learning topics presented during this series. Upon verification of their submission and sharing of their artifact workshop participants will be eligible for a completion badge.
Badges represent a professional development accomplishment. More than a nice graphic, badges provide metadata on what you have achieved to earn the badge. This perpetual badge with metadata provides an online portfolio of your achievements. No more printing, scanning, (shredding?) and organizing (losing?) of paper letters of completion. Though if you wish to print out a certificate Badgr does have a link to do that. Also no more forgetting assessment details of what you accomplished to complete the professional development either.
Why Badgr?
Badgr is a badge service that works with your UH Google account, so there is no need for you to manage username or password of another siloed account. Badgr also is based on Open Badges 2.0 protocols which allows you to download and move your badges if desired.
What if I am already using Credly for badges?
As of September 2020, Credly has transitioned to a new brand identity called Acclaim and is no longer a free service. Badgr uses Open Badging 2.0 standards, it is recommended that you download your Credly badges and upload them into Badgr.
How do I access my Badgr badge?
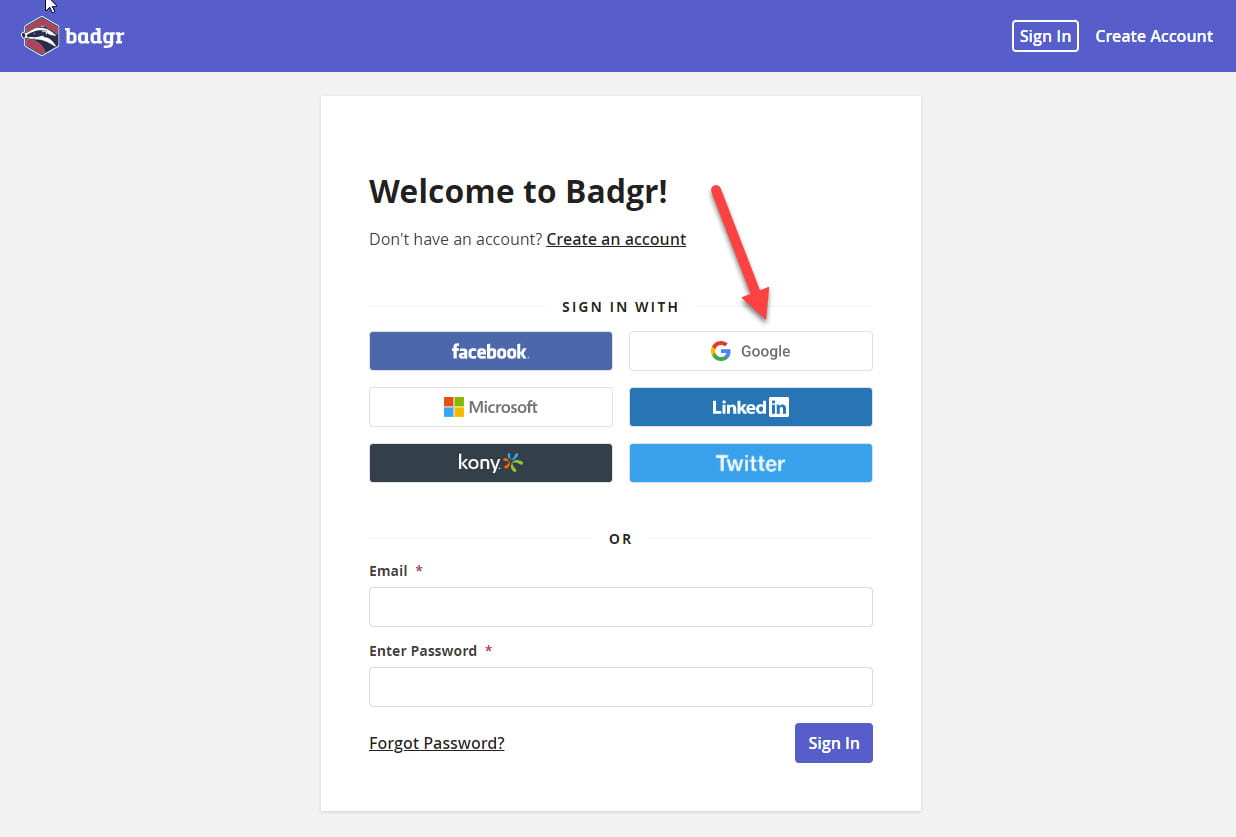
1. Visit Badgr.com or click on “Create Account” link in the email you received when you’ve earned a badge.
2. On the Welcome to Badgr page, select to Create Account with Google.
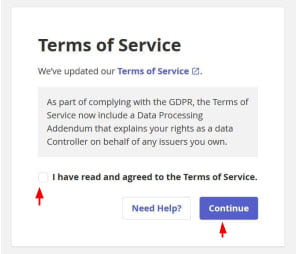
3. Check the box to acknowledge the Terms of Service and Continue.
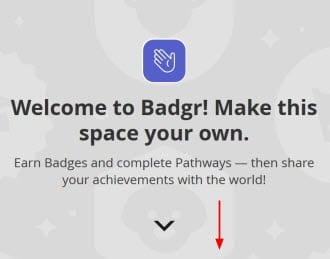
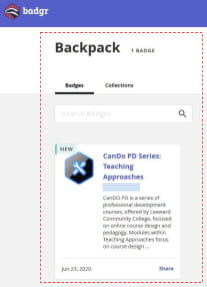
4. On the Welcome to Badgr page, scroll down to View Backpack.
5. Click on the badge title to learn more about the badge, print your certificate or share a link to it.
Thanks for taking the time to visit our EMC Blog. If you have thoughts, questions, or feedback, please comment below. – Mahalo
“It is literally true that you can succeed best and quickest by helping others to succeed.” — Napoleon Hill
Screen sharing can add a different dimension of interactivity between yourself and your participants. In a one-on-one meeting with a student, you could screen share an example in a program to help the student to visually understand what is being discussed. After going through the example with the student, you can give the student control of your screen so that they could practice another example with the file you already have out. The opposite can also be helpful if a student is sharing their screen with you regarding an error that’s occurring on their homework. You can request for remote control to briefly go over an example on their file that might be similar to the issue they are experiencing.
Zoom Remote Control can also be a great way to help students to give smoother transitions during team presentations. Check out the video below on how remote control can help your students while presenting in Zoom.
Haven’t used the remote control tool yet? View Zoom Support’s Requesting or giving remote control page to learn more about the remote control tool.
Try it out and think about creative ways you can utilize stamps into your Zoom sessions. Then, come to our optional Virtual Open Lab via Zoom on Thursday, December 9, 2021 at 1:00-2:00 p.m. to practice, ask questions, etc. You can also contact us (Educational Technologist) for help. Lastly, there will be an opportunity at the end of this 4-part microlearning series to earn a badge of achievement.
Thanks for taking the time to visit our EMC Blog. If you have thoughts, questions, or feedback, please comment below. – Mahalo
“I can do things you cannot, you can do things I cannot; together we can do great things.” – Mother Teresa
Breakout rooms are an easy way to create spaces for online collaboration. Collaboration can be anything from a small group activity, checking in with teams for a team project, or creating separate topic rooms that a participant can choose to join. When using breakout rooms, have you ever considered allowing your students to choose which room they would like to enter?
Allowing students to choose a preferred room for discussion helps to provide a level of confidence in a small group discussion. Check out the video below for ideas on implementing breakout rooms that allow students to choose the room they want to enter.
Try it out and think about creative ways you can utilize breakout rooms into your Zoom sessions. Then, come to our optional Virtual Open Lab via Zoom on Thursday, December 9, 2021 at 1:00-2:00 p.m. to practice, ask questions, etc. You can also contact us (Educational Technologist) for help. Lastly, there will be an opportunity at the end of this 4-part microlearning series to earn a badge of achievement.
Thanks for taking the time to visit our EMC Blog. If you have thoughts, questions, or feedback, please comment below. – Mahalo
“People don’t care how much you know until they know how much you care” – Theodore Roosevelt
Connect, engage, and learn about your audience by polling them. When you invite them to actively participate in your presentation and seek their input they are more likely to get more out of your presentation. Elevate your teaching with Zoom polling, you can pre-configure polling questions (step by step) or create polling questions on the fly (Polling icon in your session toolbar). Consider the benefits of collecting individual student names or make your poll responses anonymous. Lastly, you may decide to download your poll responses for later review. With pre-planning and little bit of practice, you can engage your audience with Zoom Polling.
Haven’t used the Zoom Polling feature yet? Learn more about Zoom Polling for Meetings to get started. We look forward to hearing about the creative ways to utilize Zoom Polling into your live sessions. Then, come to our optional Virtual Open Lab via Zoom on Thursday, December 2, 2021 at 1:00-2:00 p.m. to practice, ask questions, etc. You can also contact us (Educational Technologist) for help. Lastly, there will be an opportunity at the end of this 4-part microlearning series to earn a badge of achievement.
Thanks for taking the time to visit our EMC Blog. If you have thoughts, questions, or feedback, please comment below. – Mahalo
“You can’t use up creativity. The more you use, the more you have.” — Maya Angelou
Have you ever found yourself wondering how you can integrate short interactive questions in the middle of your lecture during a Zoom session like you would in a face-to-face class to engage your students? Perhaps you’re concerned about having to switch between Zoom tools or different windows? With the stamp annotation tool, you can include your interactive questions during a Zoom session without having to switch between windows. All you would need to do is to create your question slides ahead of time and insert them where you want them in your lecture slide deck. Then when you are screen sharing your slides and come upon the question slide during your live Zoom session, ask your students to utilize the Zoom stamps found in the Annotation tool under “View Options” to mark their answer virtually on your slide with the question.
It’s a great way to get everyone involved, especially students who may still be uncomfortable grabbing the mic or writing in the chat. Check out the video below for ideas on different types of questions you could implement in your Zoom session.
Try it out and think about creative ways you can utilize stamps into your Zoom sessions. Then, come to our optional Virtual Open Lab via Zoom on Thursday, December 2, 2021 at 1:00-2:00 p.m. to practice, ask questions, etc. You can also contact us (Educational Technologist) for help. Lastly, there will be an opportunity at the end of this 4-part microlearning series to earn a badge of achievement.
Thanks for taking the time to visit our EMC Blog. If you have thoughts, questions, or feedback, please comment below. – Mahalo
Join us for a new, microlearning workshop series featuring interactive activities using: Zoom.
Our first microlearning series consists of four instructional examples using the tools in Zoom to support interaction and engage your students in your Zoom classrooms. These include:
Stamps
Polling
Breakout Rooms
Remote Control
How This Works
Simply register once for this workshop series by clicking the button below and you will receive an email on Mondays and Tuesdays (see dates below) featuring examples of using Zoom to support interaction and engage your students.
Monday 11/29: Stamps
Tuesday 11/30: Polling
Monday 12/6: Breakout Rooms
Tuesday 12/7: Remote Control
When you receive the email, take some time to review the contents. Give it a try, too, and use the resources for additional help. Reflect on how you can apply it in your classes. Jot down some ideas.
Come to our optional Virtual Open Lab (Zoom sync session) on Thursdays at 1:00-2:00 p.m. to further engage in your learning by practicing what you learned with your peers, asking questions, getting ideas for your classes, etc.
Thursday 12/2: Stamps and Polling
Thursday 12/9: Breakout Rooms and Remote Control
Furthermore, there will be an opportunity to earn a digital badge credential for this series by applying your learning. More details to come later for those who register.
Thanks for taking the time to visit our EMC Blog. If you have thoughts, questions, or feedback, please comment below. – Mahalo

 My experience developing OER has changed the way I teach and interact with learning materials. I teach classes in botany and agriculture and finding materials that are relevant for Hawai‘i can be a challenge. Teaching these subjects through local examples and incorporating content relevant to Hawai‘i makes learning more relevant to my students.
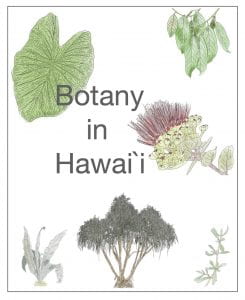
 Creating our Botany OER textbook, “